

Worn stairs create problems that slowly build over time. Concrete steps feel cold and unforgiving, especially in basements. Older wooden stairs often creak, flex, or show uneven wear from years of use.
In many Toronto and GTA homes, the stairs no longer match the flooring, which makes the space feel unfinished.
Installing wood steps on stairs is a practical upgrade when it’s done correctly. Proper preparation matters more than speed. Material choice affects durability, noise, and comfort. Installation methods also differ depending on whether the stairs are wood-framed or concrete.
This guide explains how wood steps work, why homeowners replace them, and what details actually determine long-term results.
What Are Wood Steps on Stairs?
Wood steps on stairs are made up of several components that work together as a system. Each part affects strength, safety, and appearance, so treating them as individual pieces usually leads to problems later.
Stair treads form the horizontal walking surface. Tread thickness, rigidity, and wood species determine how solid the step feels underfoot. Properly milled hardwood stair treads are designed to resist flex and wear over time.
Risers close the vertical face between steps. They control riser height consistency, which directly affects comfort and safety. Uneven risers are one of the main reasons stairs feel awkward to use.
Nosings protect the front edge of each tread and provide a defined step edge. A well-shaped nosing improves grip and prevents early edge damage. Matching nosings also helps stairs look intentional rather than patched together.
On wood-framed stairs, wood steps are fastened to stringers and substructure, so movement control is the priority. On concrete stairs, wood steps are bonded and anchored to a solid base, which makes surface preparation and fastening methods critical. The materials may look similar, but the installation approach is not.
Why Installing Wood Steps Is Necessary
Homeowners replace stair steps because daily use exposes weaknesses quickly. Below are the real reasons upgrades happen, especially in GTA homes.
Safety and daily use
Worn steps lose traction and develop uneven edges. Concrete stairs become slippery with dust or moisture. Properly installed wood steps improve grip, reduce flex, and provide a more predictable walking surface. A solid tread feels stable under load, which matters on high-traffic stairs.
Comfort and temperature benefits
Concrete holds cold year-round. Wood does not. Wood steps feel warmer and quieter, especially on basement stairs used in socks or bare feet. That comfort difference becomes noticeable within days, not months.
Visual upgrade and resale value
Stairs sit in direct sightlines. Mismatched or damaged steps lower the perceived quality of the home. Finished wood steps align the staircase with the surrounding hardwood floors, improving visual continuity and resale appeal. Coordinated stair systems make this easier to achieve.
Noise reduction in older staircases
Creaking stairs usually come from movement at joints and fasteners. Wood steps installed with proper support and fastening reduce movement, which minimises squeaks. Quiet stairs change how the whole house feels.
Consistency with existing hardwood interiors
Many GTA homes already have hardwood flooring. Wood steps allow closer matching of species and finish, which prevents the staircase from standing out as a separate element. Matching stair treads and nosings improves overall cohesion.
Long-term repair flexibility
Solid wood steps can be refinished as they wear. Scratches and dull finishes can be corrected without replacing the steps. That flexibility makes wood a long-term solution rather than a temporary cover-up.
Types of Stairs Before Installing Wood Steps
Before you buy anything, take a minute to identify your stair base. Wood-framed stairs behave one way. Concrete stairs behave differently. Older staircases can surprise you with uneven framing that no new tread can magically hide.
Once you know the stair type, every later decision becomes simpler and more accurate.
Below are the three most common stair situations I see in Toronto and GTA homes.
Wood stairs with existing treads
Wood stairs with existing treads are often the easiest path, but only if the structure is sound. Start by checking for movement, sagging, or squeaks that repeat in the same spots.If the old treads are solid and flat, a full tread replacement using quality hardwood stair treads for GTA homes is usually the cleanest long-term upgrade.
Overlay systems can work, but only when the existing tread surface is stable and level. If the base moves, the overlay will move too, and you’ll hear it.
Concrete stairs inside homes
Concrete stairs show up most in basements, split-level entries, and older additions. The concrete may look solid, yet surface condition matters a lot. When the concrete is clean and stable, installing wood steps becomes a controlled process, but you need the right prep steps and the right fastening plan.
Concrete installs also look best when the stair edge detail is consistent. That’s where properly milled stair nosings that match your tread profile make a visible difference.
Older staircases with uneven framing
Older stairs can be structurally “fine” and still be uneven. A slight twist in a stringer or inconsistent riser height will show up once new wood goes on.
Once you’ve identified your stair type, you can choose tools and materials with confidence. That’s where the job starts to feel predictable, not experimental.
Tools and Materials Needed for Wood Steps on Stairs
Good stair work isn’t about owning every tool. It’s about having the right tools to measure accurately, cut cleanly, and fasten with control.
When tools are missing, people tend to “make it work,” and stairs show every shortcut. The list below covers what you actually need to install wood steps properly, whether the base is wood or concrete.
Tools required for installing wood steps
Measuring and layout tools: A tape measure, a reliable square, and a level are non-negotiable. Add a pencil that marks clearly and a straightedge for consistent lines. For stair remodels, cardboard templating or a tread template saves you from repeating cuts, especially when walls aren’t perfectly straight.
Cutting tools: A mitre saw handles clean end cuts and angles. A circular saw works for trimming treads and ripping material when needed.
Drilling and fastening tools: A drill/driver is essential for pilot holes and controlled fastening. Use a countersink bit to keep fasteners flush. If you’re working on concrete stairs, a hammer drill and masonry bits become part of the job. Clamps help when you need pressure while the adhesive sets.
Materials required for wooden steps
Wood stair treads: Choose treads that are thick enough to feel solid and resist flex. For most homeowners, sourcing treads from a dedicated stair supplier is safer than mixing generic boards.
Risers: Risers can be wood or paint-grade material, depending on your finish plan. Consistent riser height is what matters most, so measure carefully if your staircase has settled over time.
Nosings: Nosings define the front edge and protect it from wear. Matching nosings help the staircase look intentional, especially when the stairs connect to finished hardwood floors.
Adhesives and fasteners: Use construction adhesives designed for flooring or stair work, not general-purpose glue. Fasteners should match the base material, which means wood screws for wood stairs and proper anchors for concrete stairs.
With the stair type and materials clear, you’re ready for the practical part. The next section covers how to install wood steps on a wood staircase, step by step, without skipping the details that prevent noise and movement.
How to Install Wood Steps on Stairs (Wood Staircase)
Installing wood steps on stairs that are already wood-framed is usually straightforward, but it’s easy to get sloppy because the structure feels familiar. The difference between a stair that feels solid for years and one that creaks in six weeks comes down to prep and fit.
Take your time here. Stairs punish rushed work because every step repeats the same pressure point day after day.
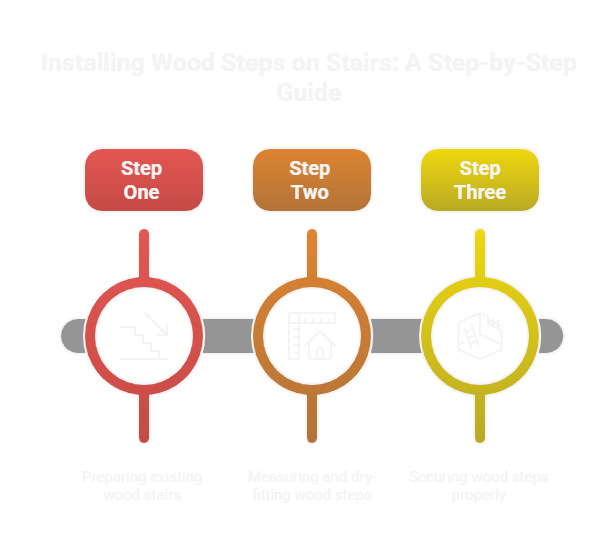
Step One: Preparing existing wood stairs
Start by stripping the staircase down to what you’re actually working with. Remove old coverings, staples, and debris. Vacuum thoroughly, then inspect the stringers and supports for cracks or soft spots.
Identify squeaks by stepping in the same places and listening for movement. Tighten loose areas by reinforcing from underneath where possible.
Next, check the level and flatness. Don’t chase perfection, but avoid obvious rocking points. Use shims or sanding to correct high spots. A tread that sits flat stays quiet. A tread that bridges a gap tends to creak later.
If your plan is for a cohesive stair look, consider the tread as part of the overall design. Many homeowners review the full stair system so that tread thickness, edge detail, and matching pieces align cleanly.
Step Two: Measuring and dry-fitting wood steps
Measure each step individually. Even “identical” stairs can vary slightly. Walls bow. Trim isn’t square. Old framing shifts. Cut one tread, dry-fit it, and confirm the edge alignment before repeating the pattern.
Cardboard templating is worth the extra minutes when the stairwell is tight or the wall line is irregular.
Dry-fitting prevents two common problems: side gaps that look sloppy and misalignment at the front edge.
If you’re using nosings, confirm that the tread overhang and nosing profile look consistent from step to step. Matching the profile to your chosen components makes the finish look intentional, not improvised. For reference, see matching stair nosings for hardwood treads.
Step Three: Securing wood steps properly
A durable install uses both adhesive and fastening, not one or the other. Apply a quality construction adhesive in a pattern that supports the tread evenly, then set the tread into place with firm pressure.
Fasten with screws in locations that won’t split the wood, and that can be concealed if needed. Countersink properly so fasteners don’t interfere with finishing.
Focus on nosing alignment. The front edge is where people see wear first and feel instability first. Keep the overhang consistent and ensure full support under the leading edge. A well-supported tread edge stays quiet and feels solid underfoot.
When your wood staircase steps are installed correctly, the job should feel “boring” in the best way. Each tread sits flat, feels stable, and looks consistent. The next step is learning how concrete changes the process, because bonding wood to concrete has different rules and different failure points.
How to Install Wood Steps on Concrete Stairs
Installing wood steps on stairs built from concrete requires a different mindset than working on wood framing. Concrete offers strength, but it removes flexibility. Success depends on surface preparation, moisture awareness, and fastening methods that control movement over time.
When concrete stairs are treated like wood stairs, failures tend to show up months later rather than immediately.
Step One: Preparing concrete stairs for wood steps
Preparation starts with moisture and surface condition. Concrete must be dry, stable, and free from loose material before any wood touches it. Moisture issues are common on basement stairs, so check for dark staining, surface powder, or previous coatings that could interfere with bonding.
Grinding or scraping may be needed to expose clean concrete. Once clean, check flatness. Minor dips can be patched, but large inconsistencies need correction before wood steps are introduced.
Step Two: Attaching wood steps to concrete stairs
Concrete does not flex, but wood does. The attachment method must account for that difference. High-quality construction adhesives designed for flooring applications help create a continuous bond, while mechanical anchors control movement during seasonal changes.
Leave appropriate expansion gaps at walls and fixed points so the wood can move without cracking or lifting.
Solid hardwood stair treads perform best when they are supported evenly and allowed to breathe. Matching tread thickness and edge profiles also helps control stress at the front edge of each step, especially when paired with consistent stair nosings.
Step Three: Finishing edges and transitions
Concrete stairs often meet finished flooring at the top or walls along the side. Those transitions need attention. Gaps should look intentional, not accidental. Clean termination against walls improves appearance and simplifies future maintenance.
When stairs connect to finished floors, coordinated floor transitions help the staircase feel integrated rather than added later.
At that point, most problems people experience come not from the stair type, but from avoidable mistakes during installation.
Common Mistakes When Installing Wood Steps on Stairs
Most stair issues are not caused by bad materials. They come from skipped steps and rushed decisions. The mistakes below appear repeatedly in stair repairs and renovations across the GTA.
Skipping proper measurement
Stairs rarely repeat perfectly from top to bottom. Measuring once and cutting in bulk leads to gaps, uneven overhangs, and wasted material. Each step should be measured and confirmed before cutting.
Using the wrong adhesive or fasteners
General-purpose adhesives and mismatched fasteners fail under stair loads. Wood steps need products designed for structural bonding and movement control. Cutting corners here often leads to squeaks and loose treads.
Ignoring nosing alignment
The front edge of each step is the most visible and most abused area. Inconsistent nosing projection looks sloppy and feels unsafe. Proper stair nosings protect the edge and create a consistent walking rhythm.
Rushing the finishing process
Finishes need time to cure. Walking on steps too soon traps dust, creates marks, and weakens protective layers. Rushing finishing shortens the lifespan of wood steps more than almost any other mistake.
Where to Buy Wood Steps on Stairs in Toronto & the GTA

Once installation requirements are clear, sourcing becomes the decision that locks everything in. The supplier you choose affects fit accuracy, finish quality, installation time, and how the stairs age over the years of use.
In Toronto and the GTA, staircases rarely match retail assumptions, which is why buying the right way matters.
Below is how the main options compare in real projects.
Buying wood steps from big-box stores
Retail suppliers are built around speed and standardisation. Their products are designed to fit as many situations as possible, not specific staircases.
Big-box wood steps typically offer:
- Fixed tread lengths and thicknesses
- Limited wood species and grain selection
- Generic nosing profiles
- Minimal coordination with existing stairs or floors
These products can work when:
- The stair run is short and straight
- Visual matching is not critical
- Minor gaps or adjustments are acceptable
Limitations usually appear once stairs need precise fitting, longer runs, or clean alignment with existing hardwood floors. Most compromises show up during installation, not at checkout.
Buying custom wood steps from a local manufacturer
Local manufacturing works in the opposite direction. The staircase comes first. The wood steps are made to suit it.
Custom wood steps produced locally allow:
- Exact tread lengths without splicing
- Consistent thickness that preserves riser height
- Species matching with existing hardwood floors
- Coordinated edge profiles and nosings
Ordering custom hardwood stair treads sized for your staircase avoids cutting down oversized pieces on site and reduces visible joints.
When stair components are planned together, edge details line up cleanly and wear more evenly. That’s especially noticeable when matching stair nosings designed to work with the tread profile rather than generic edges.
AV Hardwood manufactures stair components in Etobicoke and supplies projects across Toronto and the GTA.
Because fabrication happens locally, stair dimensions, wood species, and finishing can be adjusted before production rather than corrected later. Many homeowners review completed stair projects to judge consistency and finish quality before ordering.
Big-box vs AV Hardwood Manufacturers: Practical Comparison
| Factor | Big-Box Retail | AV Hardwood Manufacturers |
| Tread length | Fixed sizes | Made to the exact stair length |
| Thickness control | Limited | Matched to existing risers |
| Wood species | Few options | Broad hardwood selection |
| Nosing alignment | Generic | Profile-matched |
| Installation time | Longer due to adjustments | Faster, fewer corrections |
| Visual consistency | Often compromised | Designed as a system |
| Best for | Basic, short stairs | GTA homes and renovations |
Suppliers who work with complete stair systems, rather than isolated parts, tend to flag problems earlier and reduce on-site adjustments.
For homeowners planning concrete stair upgrades or full stair renovations, discussing measurements and finishes before ordering often prevents wasted material and delays. Clear communication during planning saves far more time than it costs.
Frequently Asked Questions
Can wood steps be installed over concrete stairs?
Wood steps can be installed over concrete when moisture is controlled, and proper adhesives and anchors are used. Surface preparation determines success more than wood choice.
What thickness should wood stair treads be?
Most stair treads are between one inch and one and a quarter inches thick. Thickness affects rigidity, sound, and long-term durability.
Is installing wood steps on stairs a DIY project?
Straightforward staircases with good access can be handled by experienced DIY homeowners. Complex layouts, uneven framing, or concrete stairs often benefit from professional involvement.
How long do wood steps last?
Properly installed wood steps can last decades. Longevity depends on material quality, installation method, and finish maintenance.
Do wood steps need nosings?
Nosings are strongly recommended. They protect the tread edge, improve grip, and help stairs age evenly under daily use.
Final Verdict
Wood steps on stairs make sense when comfort, safety, and long-term durability matter. Preparation determines success more than speed, especially on concrete or older staircases.
Choosing materials designed for stair use and sourcing from suppliers who understand stair system changes the outcome in ways shortcuts never will.
A well-installed staircase should feel solid, quiet, and visually consistent. When those qualities fade into the background of daily life, the work has been done correctly.